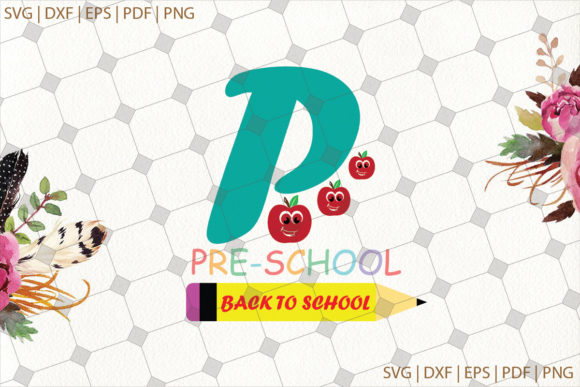
Welcome Back to Preschool: Creative Personalization for a Memorable Start
There is a moment every year that carries a unique blend of excitement, nervousness, and hope: the first day back at preschool. For educators, parents, and little learners alike, this transition sets the tone for months of discovery, growth, and creative play. In recent years, the way we prepare for this milestone has shifted from generic store-bought decorations and labels toward something far more meaningful — customized, personalized designs that reflect individual personalities, classroom themes, and family values. Digital crafting files in formats like SVG, PNG, DXF, EPS, and PDF have become the go‑to tools for anyone looking to create one‑of‑a‑kind welcome materials, from door signs and name tags to teacher gifts and activity sheets. Whether you are a seasoned crafter, a busy parent, or a preschool director planning a warm reception, the ability to personalize every detail has never been more accessible — or more rewarding.
Why Personalization Matters in a Preschool Setting
Young children thrive in environments where they feel seen and valued. A personalized welcome sign featuring a child’s name, favorite colors, or beloved animal characters can transform a classroom from an unfamiliar space into a place of belonging. Research in early childhood education consistently shows that when children see their own identity reflected in their surroundings, their sense of security and engagement increases. For teachers, customized name tags, cubby labels, and welcome banners help streamline daily routines while fostering a warm, inclusive atmosphere. For parents, sending a child off with a personalized backpack tag or a handmade welcome card adds an emotional layer of comfort and pride. This is where digital crafting files become invaluable: they allow anyone with a Cricut, Silhouette, or even a simple home printer to produce professional‑grade, customized items quickly and affordably.
The Shift Toward Digital Crafting and Custom Designs
Over the past decade, the world of DIY crafting has undergone a quiet revolution. Where once you needed a steady hand, expensive die‑cut machines, or a professional graphic designer to create custom decals and labels, today you can purchase a single digital file and produce endless variations. The rise of platforms like Etsy, Creative Market, and independent stores has made it possible for small‑shop owners and independent designers to offer ready‑to‑use SVG, PNG, DXF, EPS, and PDF files that work seamlessly with popular cutting and design software. This shift is not just a trend — it reflects a broader cultural move toward individual expression, sustainability, and hands‑on creation. Instead of buying mass‑produced items that may not fit a specific theme or size, parents and educators can now tailor every element of their preschool welcome setup. The result is a more thoughtful, efficient, and enjoyable preparation process.
Understanding the File Formats: What You Get and How to Use Them
When you purchase a digital welcome‑back‑to‑preschool design, you typically receive a bundle of file formats, each suited to different tools and workflows. Knowing the differences helps you get the most out of your purchase without frustration.
- SVG (Scalable Vector Graphics) – This is the most versatile format for cutting machines. It works with Cricut Design Space, Silhouette Studio (Designer Edition), Adobe Illustrator, Inkscape, and Corel Draw. Because it is vector‑based, you can resize it without losing quality, making it ideal for everything from tiny name tags to large classroom banners.
- DXF (Drawing Exchange Format) – Often preferred by Silhouette users, especially those using the free version of Silhouette Studio. DXF files allow precise cutting paths and can be imported directly into the software. They are also useful for CAD‑like applications.
- EPS (Encapsulated PostScript) – A standard format for professional design software such as Adobe Illustrator and Corel Draw. EPS files preserve layers and colors, giving advanced users full control over editing. If you plan to modify colors, add text, or combine elements, EPS is a solid choice.
- PNG (Portable Network Graphics) – A high‑resolution raster image with a transparent background, typically 300 dpi. PNG files are perfect for printing — on paper, cardstock, sticker sheets, or fabric. They can also be used in many online design tools and are great for quick mock‑ups or digital sharing.
- PDF (Portable Document Format) – A universally accessible format for printing and previewing. PDFs are easy to open on any device and are often included as a ready‑to‑print version of the design, especially useful for educators who may not have cutting machines.
Having all these formats in one download means you are covered whether you are cutting vinyl for a classroom door, printing labels for cubbies, or creating a digital photo backdrop for the first day of school. It eliminates compatibility headaches and lets you focus on the creative process.
Bringing the Welcome Theme to Life: Practical Ideas for Every User
The beauty of a customized preschool welcome design is its versatility. Here are a few realistic ways different users can make the most of these digital files:
- Classroom teachers and directors can create a cohesive welcome set: a large “Welcome Back” sign for the entrance, individual name tags for cubbies, and a bulletin board display featuring each child’s name. Using SVG or DXF files, you can cut vinyl in school colors or vinyl that matches your classroom theme — whether it is under the sea, outer space, or a garden of friends.
- Parents can personalize a water bottle, lunch bag, or backpack with a vinyl decal that includes their child’s name and a favorite character or icon. The transparent PNG version of the design can also be used to print custom stickers or iron‑on transfers for clothing.
- Freelance creators and small business owners can use the files as a base to create physical products for their own shops — think personalized welcome kits, gift sets, or custom orders for local preschools. The EPS format allows for easy tweaking of colors and text, so you can offer variations without starting from scratch.
- Homeschooling families can print or cut a set of welcome materials to designate learning spaces, organize supplies, and make the start of the school year feel special even at home. A custom banner or door hanger can mark the transition from summer mode to school mode.
These examples are not hypothetical — they reflect how thousands of creators and families are already using digital designs to enhance the preschool experience. The key is to start with a high‑quality file that offers flexibility across different media.
How to Choose the Right Design and Ensure a Smooth Creative Process
When browsing for a preschool welcome back design, look for clear previews that show the elements included: text, graphics, color separation (if applicable), and scale. A well‑organized file bundle will include separate layers or grouped pieces, making it easier to isolate parts you want to customize. Many designers also offer a preview of how the design looks when cut or printed, which helps set expectations.
To get the best results, keep a few practical tips in mind:
- Always test your design on a small scrap piece of material before cutting or printing the final version, especially if you are using a new brand of vinyl or paper.
- For cutting machines, check that your software is up to date and that you have imported the correct format (SVG for Cricut, DXF recommended for Silhouette free edition).
- If you plan to add personalized names or dates, use the EPS file (if you have Adobe Illustrator or Inkscape) or edit the SVG in a vector program. PNG files are not editable for text changes.
- Consider the color palette: a warm, welcoming design often uses soft pastels or bright, friendly primaries. Make sure the colors you choose complement your classroom or home decor.
- If you are ordering from a store that offers customization, double‑check the wording and spelling before confirming. A small error can be frustrating, but a careful review ensures a smooth outcome.
The Value of Personalized Welcome Materials in Today’s Educational Landscape
In an era where digital communication often replaces physical touchpoints, the act of creating something tangible for a child’s school experience carries extra weight. Personalized welcome items signal to both children and their families that this new chapter is being celebrated intentionally. They also serve as conversation starters, helping children connect with their environment and with each other. For teachers, a thoughtfully designed classroom entrance can reduce first‑day anxiety and create a sense of community from the moment families walk through the door. For parents, the opportunity to contribute something handmade — or to purchase a design that can be customized and printed at home — adds a layer of involvement that extends beyond drop‑off.
Moreover, the digital nature of these files aligns with modern lifestyles: they are delivered instantly, stored permanently, and can be reused year after year (with updated names or themes). This sustainability aspect is increasingly important to families and educators who want to reduce waste without sacrificing creativity. Instead of buying new disposable decorations each fall, you can simply re‑cut or re‑print from the same file, adjusting details as needed.
Making the Most of Your Purchase: A Quick Workflow Recommendation
For those new to digital crafting, here is a straightforward workflow that works well for a preschool welcome project:
- Choose your design – Look for a file bundle that includes SVG, DXF, EPS, PDF, and PNG so you have all options available.
- Download and unzip – Most stores deliver a compressed folder. Extract the files to a dedicated folder on your computer.
- Open the SVG in your cutting software – If you are using Cricut Design Space, upload the SVG and resize as needed. For Silhouette, open the DXF or SVG in your version of Studio.
- Customize the text – If the design includes a text layer and you want to change it, open the EPS or editable SVG in a vector program, make your edits, then save as a new SVG.
- Cut or print – For vinyl or cardstock, proceed with cutting. For stickers or paper items, use the PNG file to print at high quality on your home printer or at a local print shop.
- Assemble and display – Weed the vinyl, transfer it to your surface, or mount your printed pieces. Your personalized welcome is ready to go.
This process might sound technical, but once you have done it once, it becomes second nature. Many users find that the satisfaction of creating a custom piece far outweighs the small investment of time.
Looking Ahead: The Growing Role of Customization in Early Childhood Spaces
As families and schools continue to value individuality and hands‑on creation, the demand for flexible, high‑quality design files will only increase. What started as a niche hobby has become a practical resource for educators, parents, and entrepreneurs alike. The preschool welcome back to school category is especially meaningful because it marks a moment of new beginnings — and a personalized touch makes that moment unforgettable. Whether you are crafting for your own child, your classroom, or your customers, the ability to download a file and turn it into something real is a small kind of magic. And with the right files in hand, you are ready to create a welcome that truly says, “We are happy you are here.”